Going through a lock for the first time can seem like an intimidating procedure. This is natural reaction, but it comes less intimidating the more locks you go through. www.sailbeauty.com
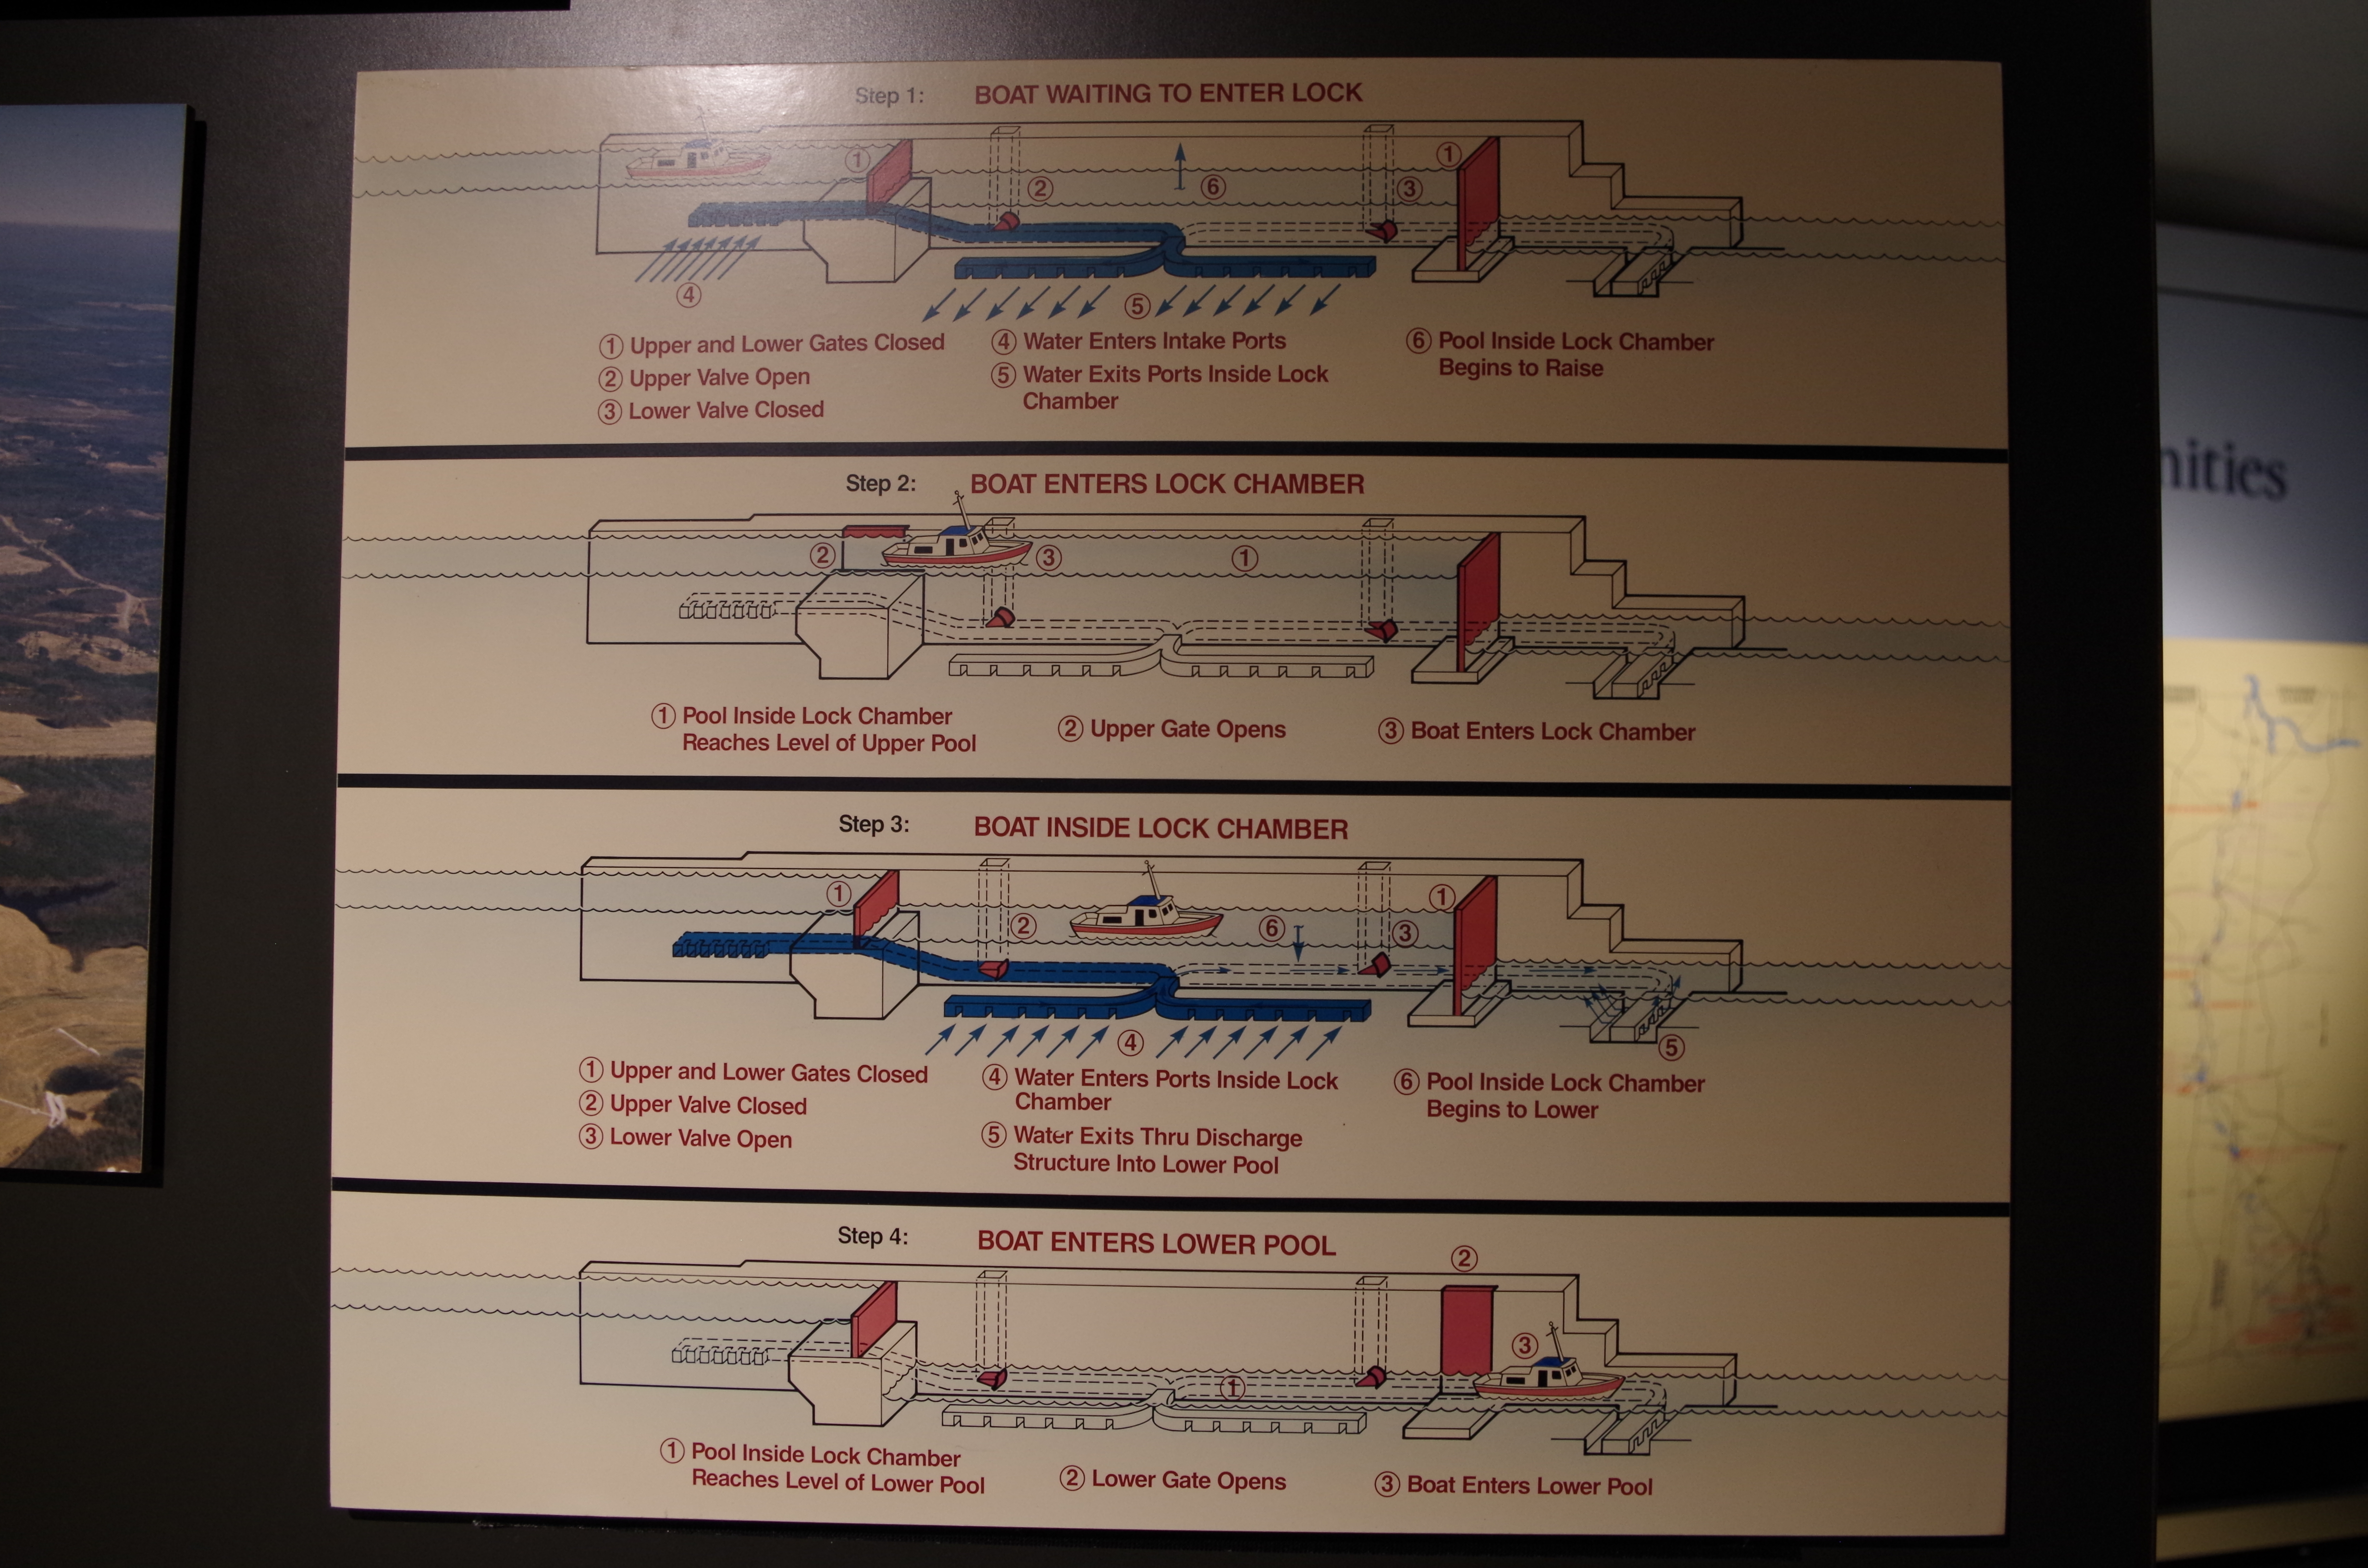
Here is a picture from the Whitten Lock Dam museum that shows how the Whitten lock works..
The process starts by approaching the lock within a few miles and hailing the lock on channel 16 or some predetermined channel based on the lock. For busy locks, we call a few hours before hand on the cell phone and ask for instructions. Here is a pic of the entrance to the Whitten lock from shore.

The lock master gives us final instructions such as which side to lock on and be sure to wear life jackets. He/She will typically tell us to wait for an opposite tow to clear, then enter. A red or green light on the lock entrance indicates if we can enter (green) or must wait (red). Sometimes the lock master will tell you to tie up in a certain place or wait off the channel in a certain spot.
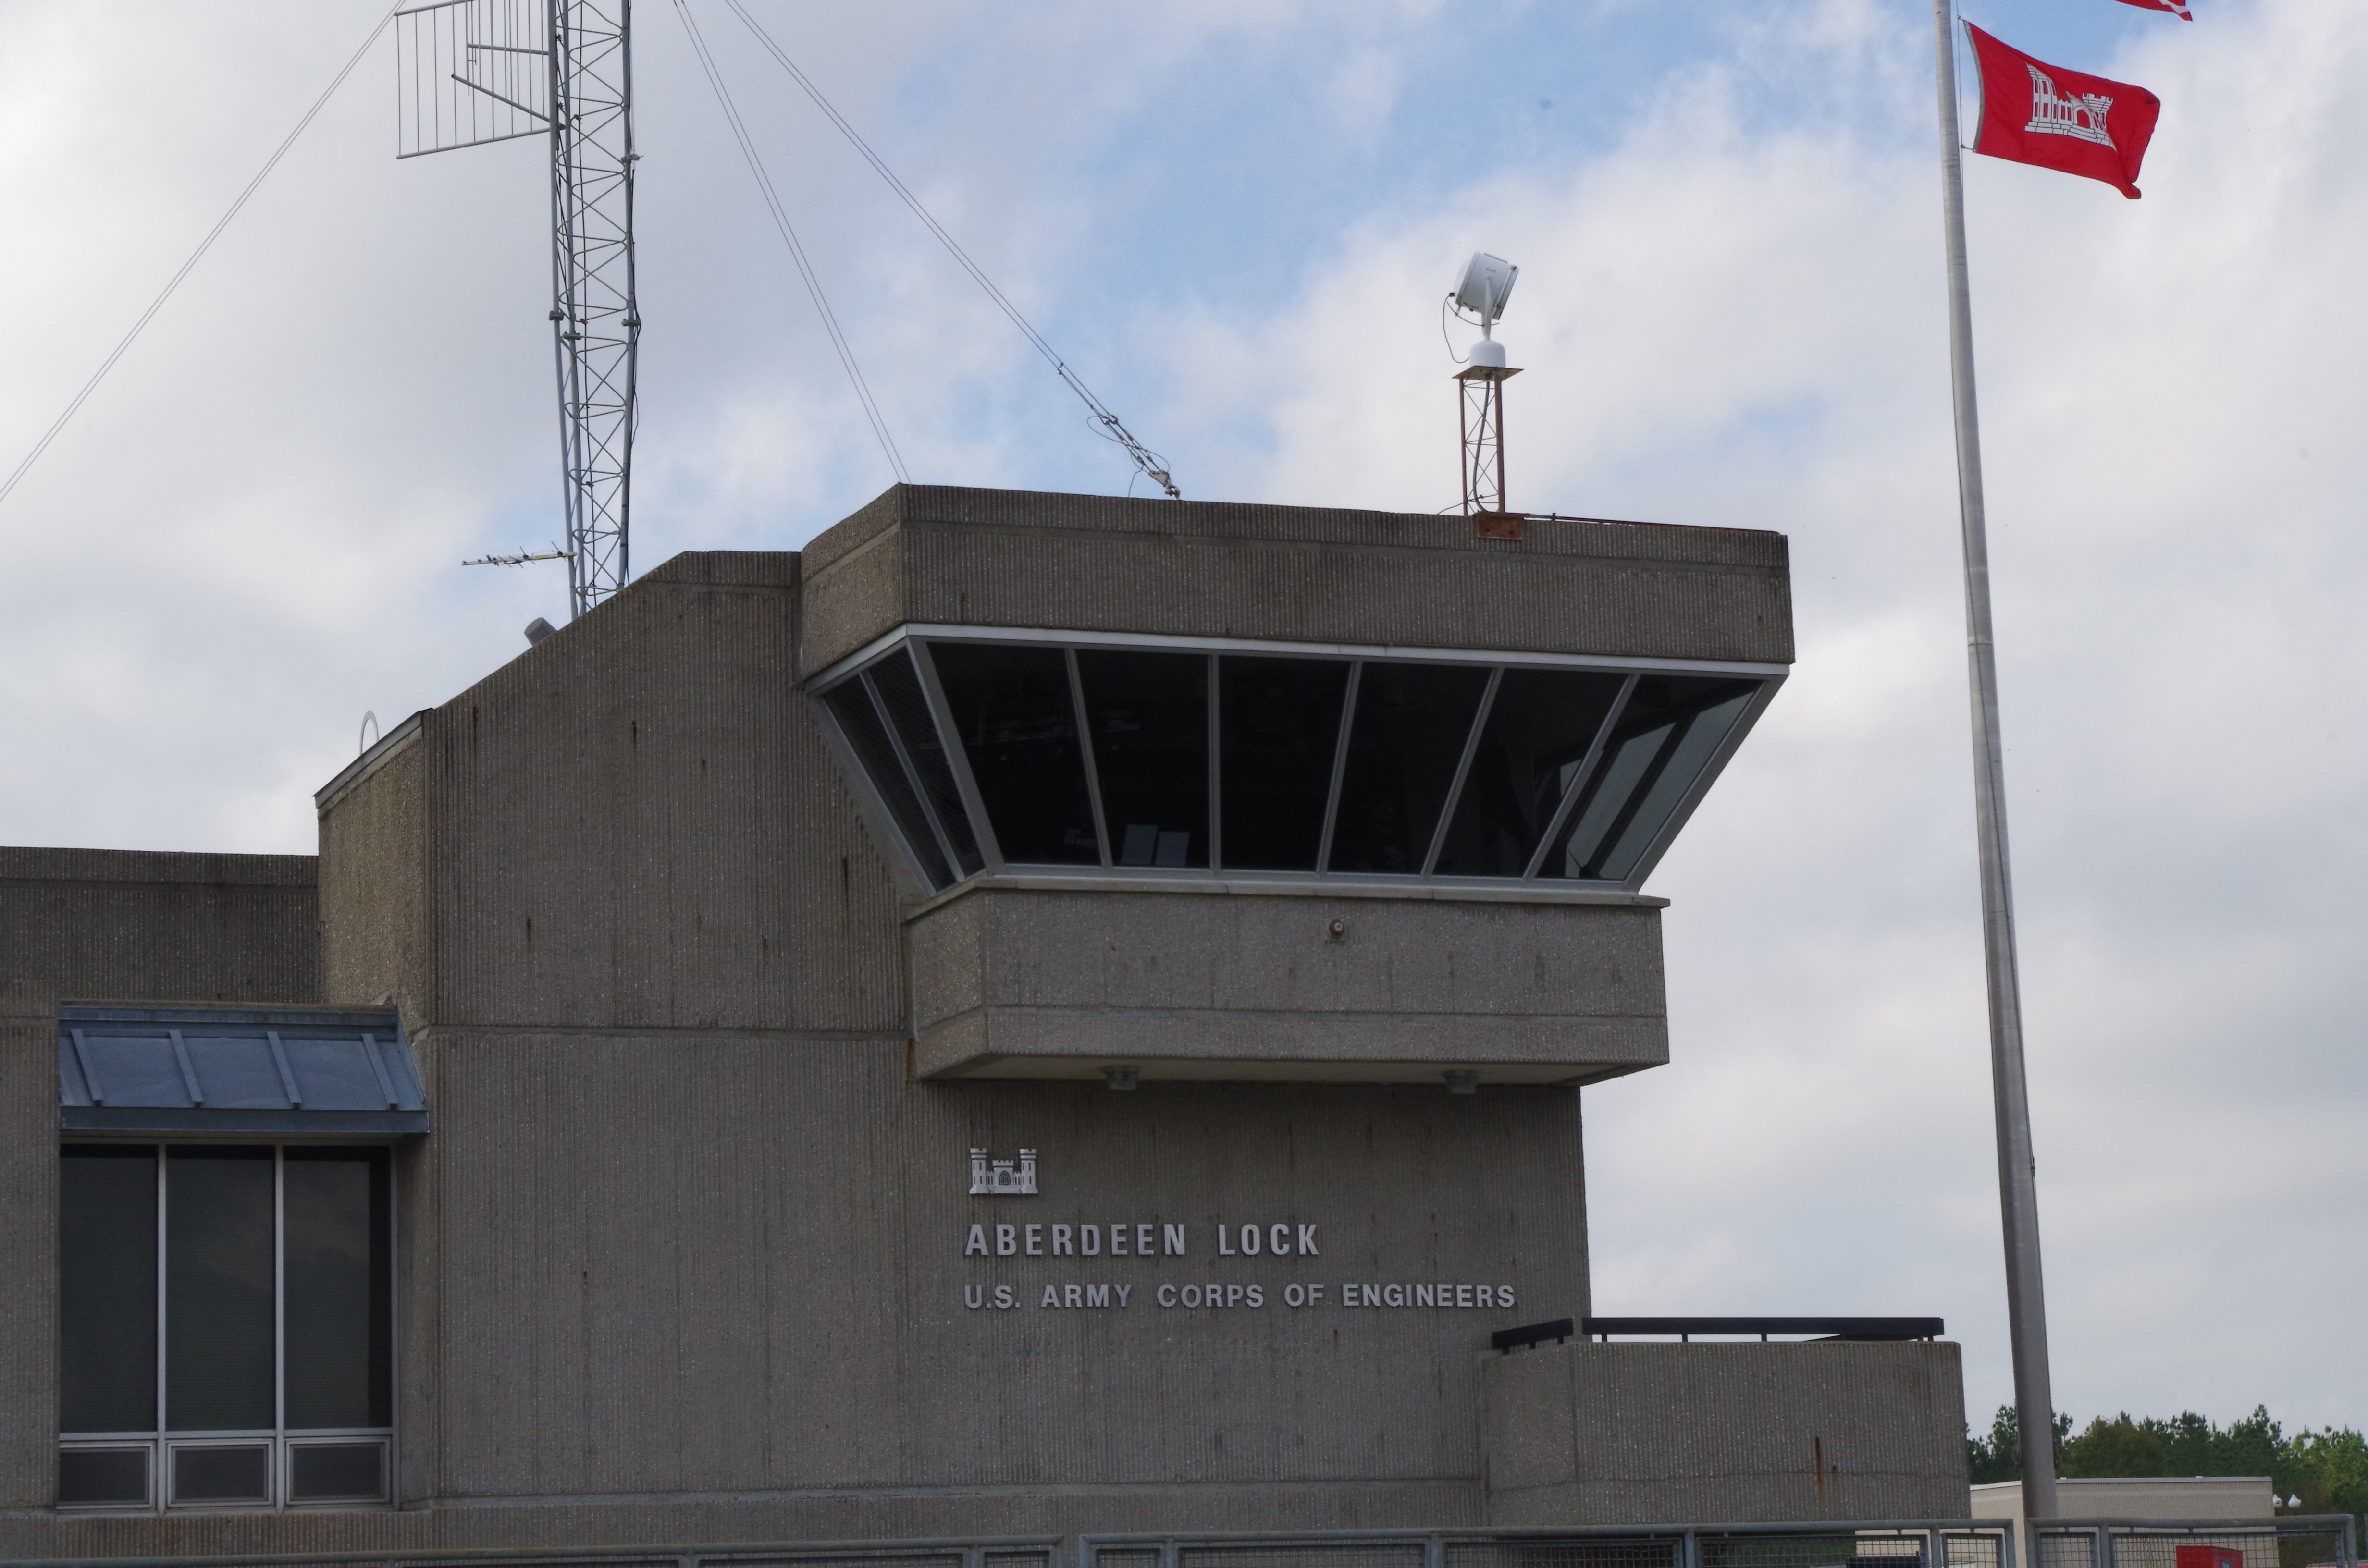
Here is a picture coming up to the lock entrance. There is typically a long wall on one side (left in this picture) and a shorter wall on the other side (right). The lock master sits in a building over looking the lock (just above the right kayak). This is the Aberdeen Lock on the Tombigbee. The red/green light will be on the end of one of these walls. We typically use binoculars to see the red/green lights as we are about 1/2 to 1 mile away waiting.

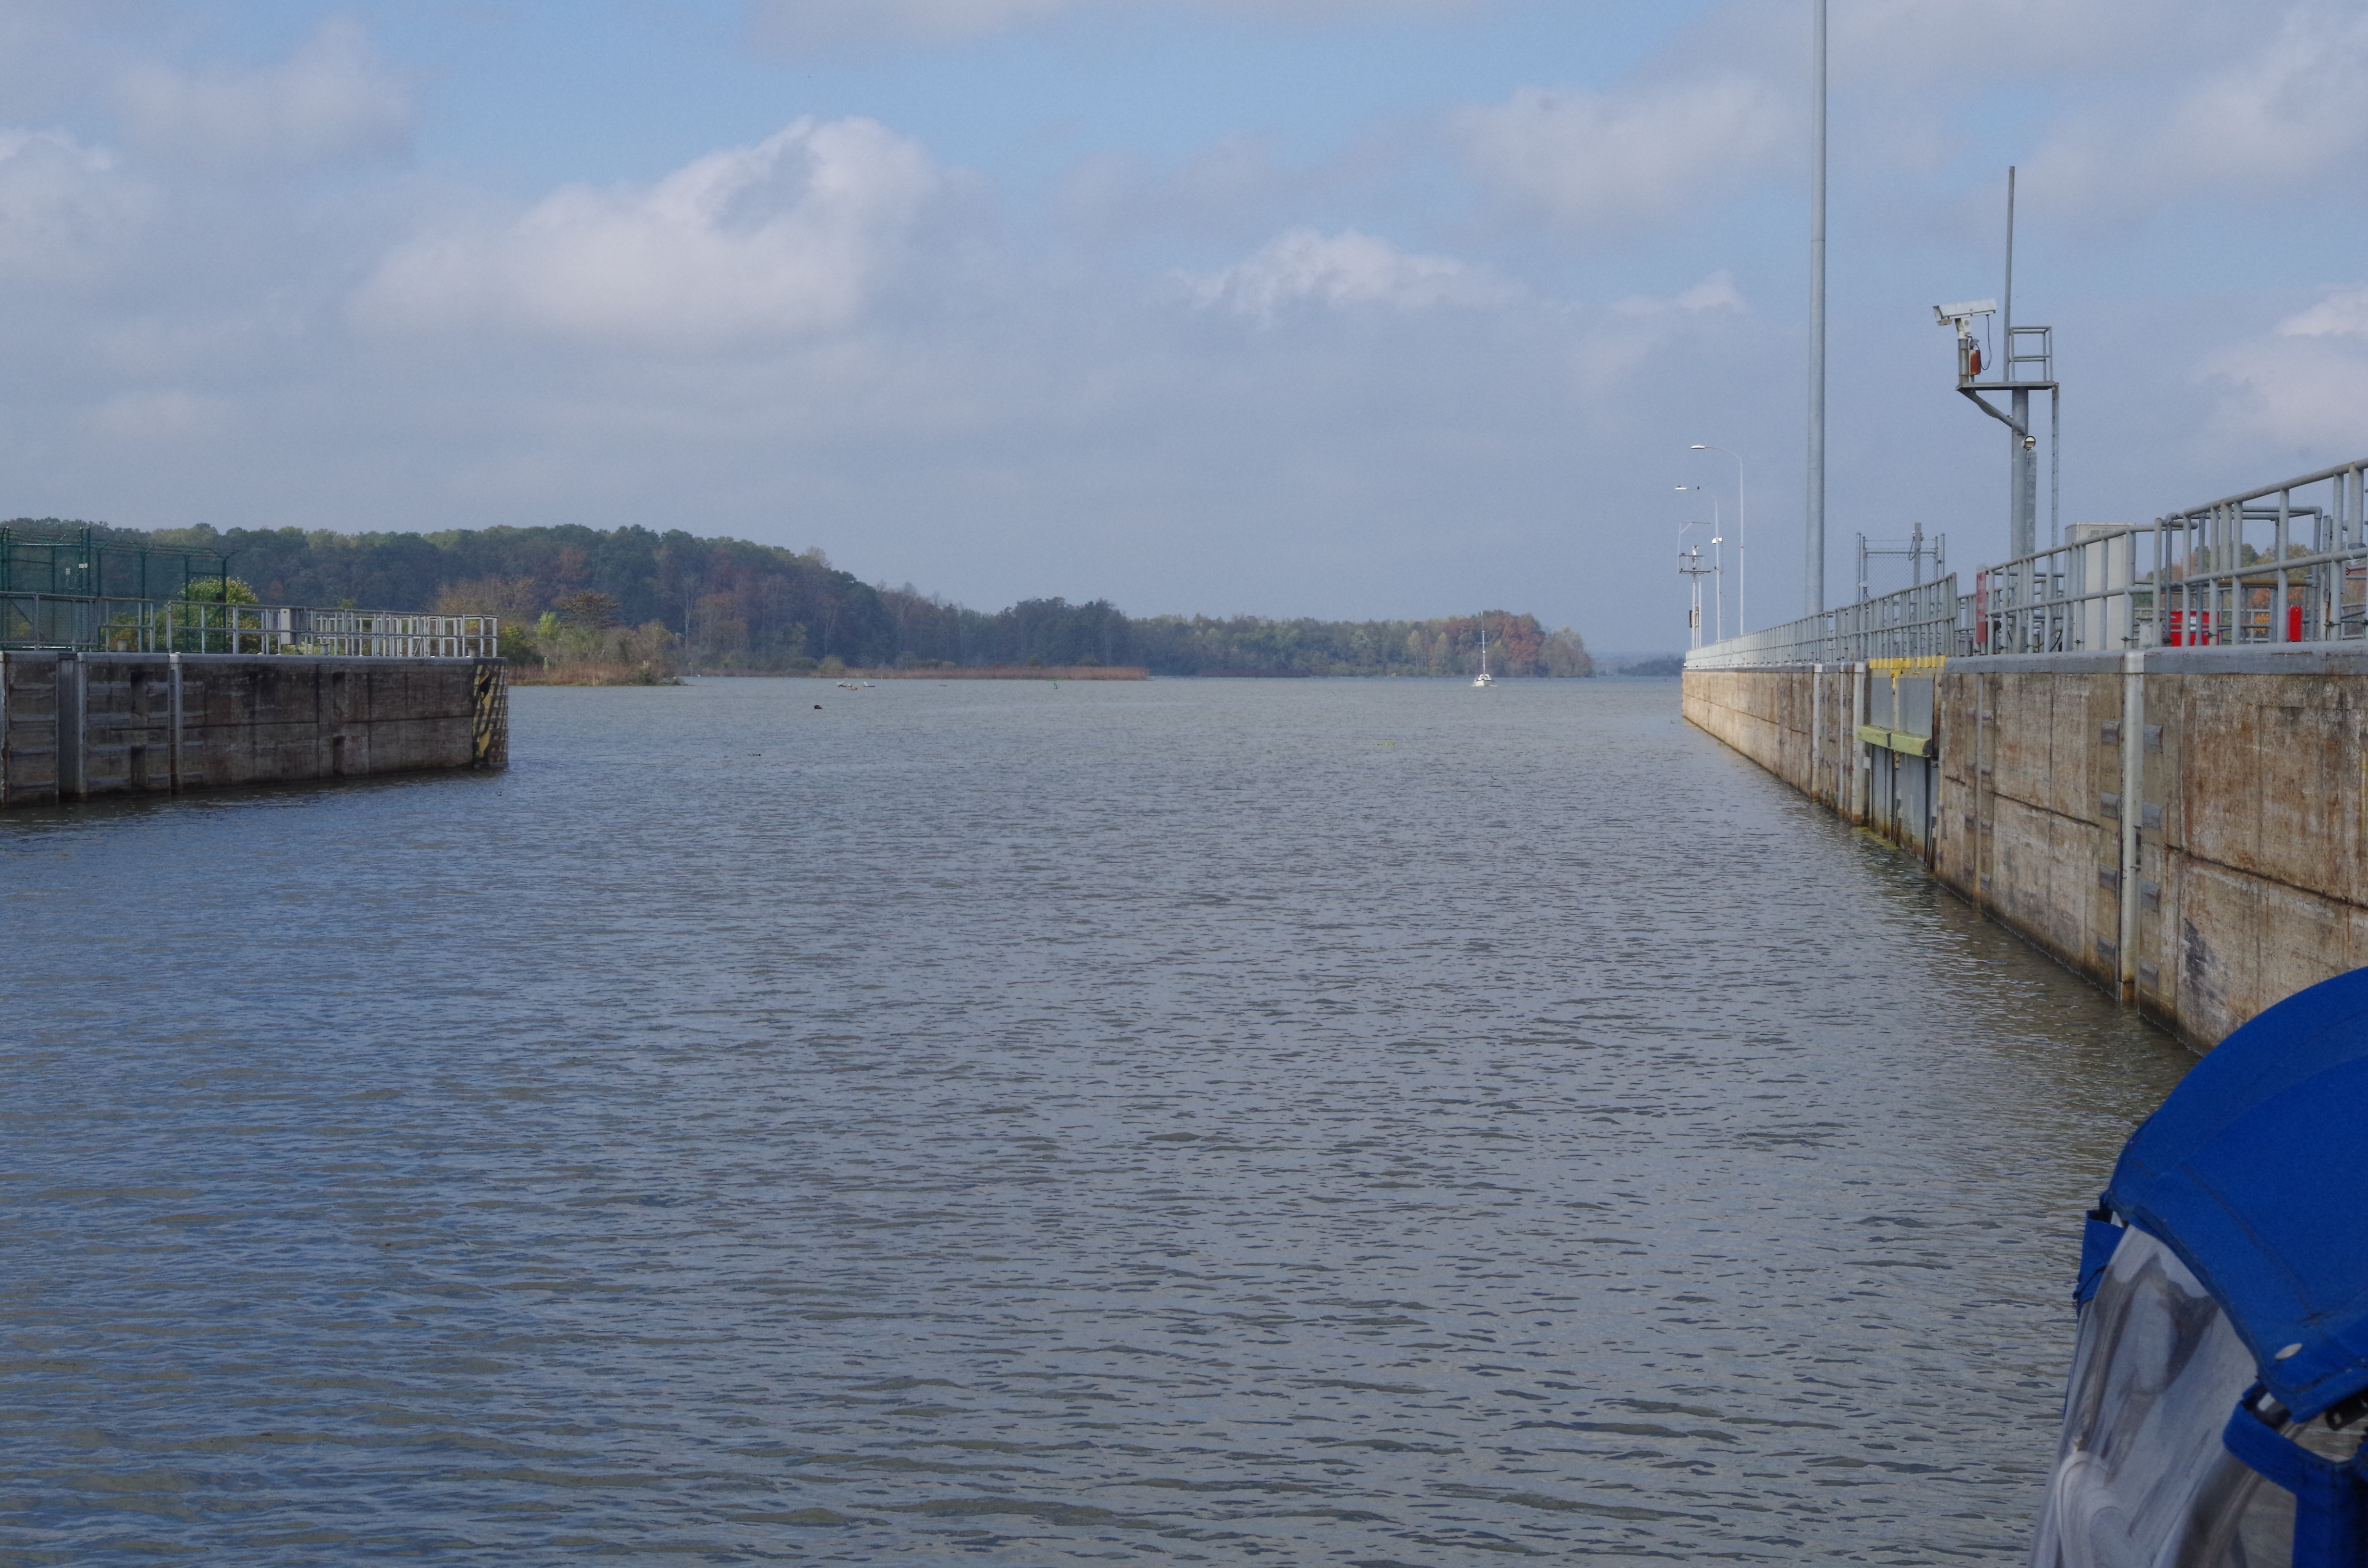
Here is a view from just inside the Aberdeen looking back towards the lock entrance. The entrance is quite wide and water will be typically at least 12 feet deep. Typical tows require 9-10 feet.
Our preference is to tie up on the port side as prop walk will draw us into the lock wall when we reverse to stop. However, unbound locks often prefer us to tie on the starboard. It depends on turbulence in the lock during the locking process. We typically enter the lock at about 4 mph and slow down to about 0.2 mph just before tying up.
The end of the lock can appear very close as we enter the lock, but it becomes apparent that 600 feet is quite long. Typically, the first one that enters the lock pulls as far forward as possible. This is a picture of the Whitten Lock on the Tombigbee.

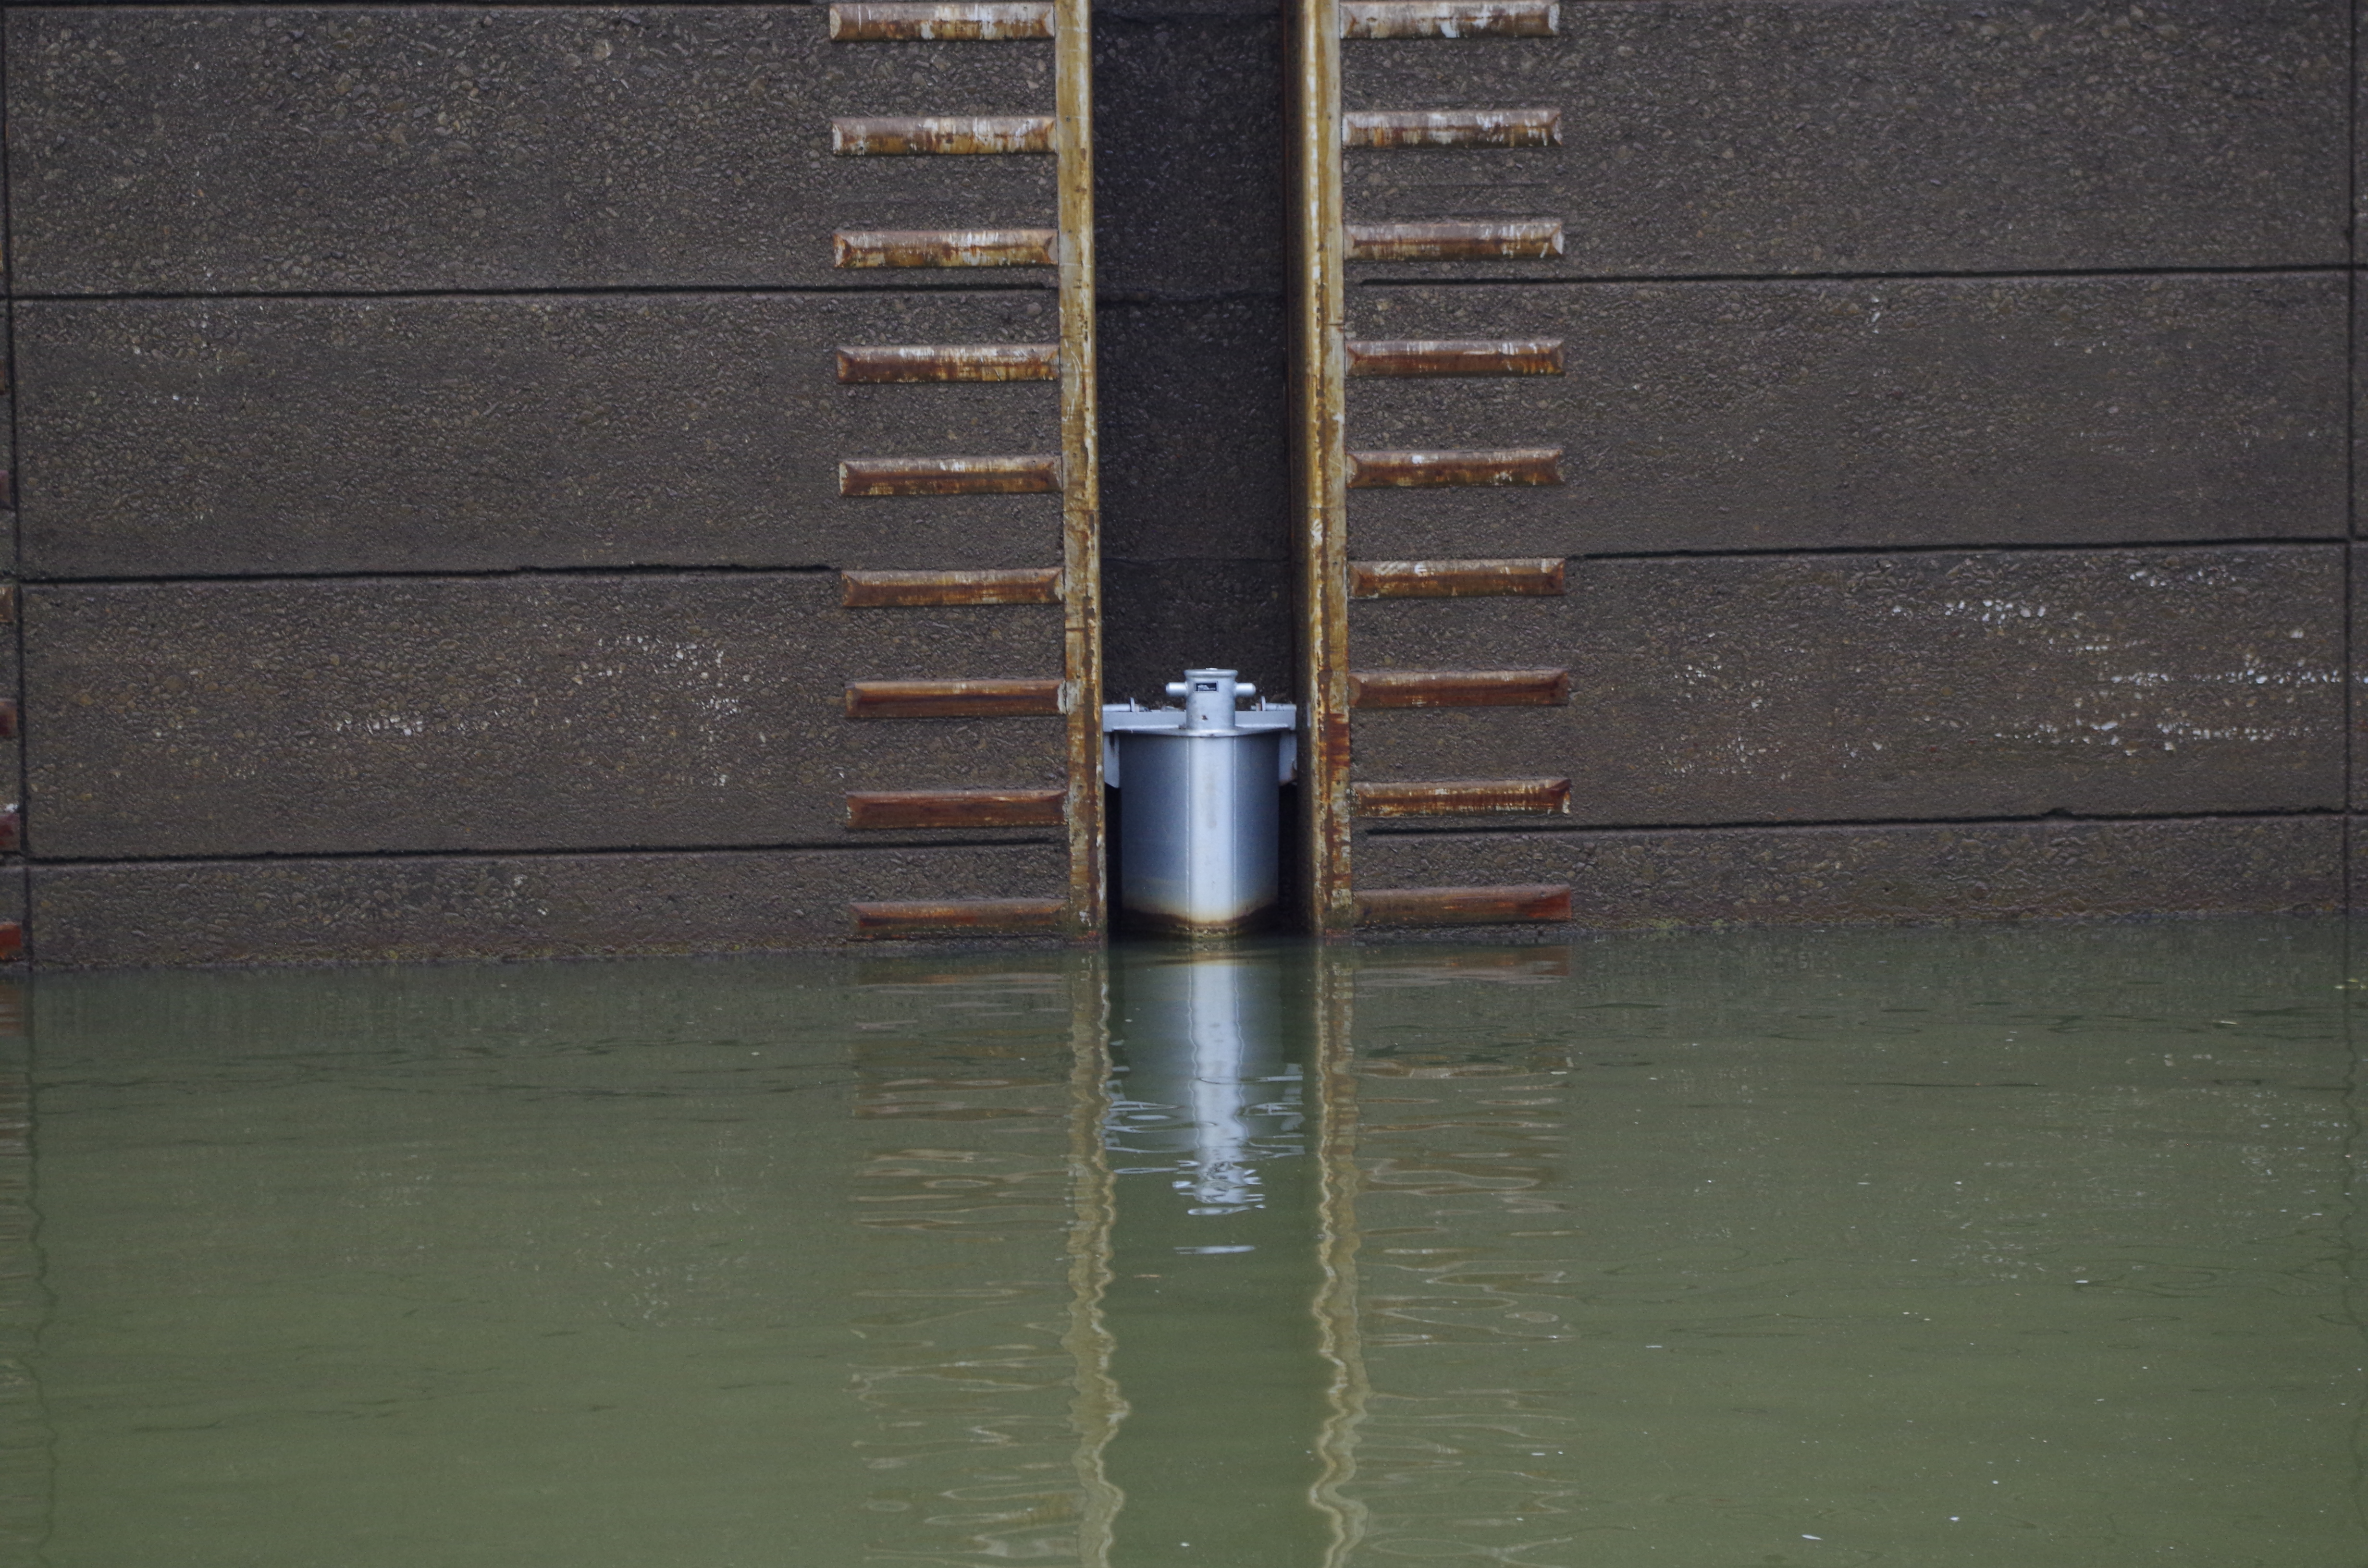
On most all the locks on the Illinois, Mississippi and Tombigbee we tied to to “floating bollards”. These are huge floating cans about 5 feet in diameter that have a “cleat” on them. They ride up and down with the water on slides built into the lock wall. Steel wheels inside steel slots allow them to rise and fall easily.
Here is a picture of a floating bollard. I think this is a picture from the Amory lock on the Tombigbee.
We found the best way for us was to tie two lines to the bollard. The first line from the springer (cleat near the center of the boat) and a second line from the aft cleat (rear of the boat). At first we used two separate lines. However, this became a bit clumsy getting two lines connected, particularly in high winds.
We developed our current technique using two lines tied together. We create a large loop on one line and tie the other line to this loop. The large loop is used to loop around the bollard. This loop is cleated at the springer and the other is cleated aft.
Bryce motors up to the bollard and I slip the loop around the bollard. The line is already secured on the springer and Bryce just tightens it up on the aft cleat after I slip the loop on the bollard. After he tightens it, he reverses the engine to bring us to a complete stop. Here I am placing the loop. Look how big these bollards are!!

In high winds, Bryce can use a bit of forward or reverse on the engine to hold the boat straight. It is critical the boat be held straight because the mast sticks out about 10 feet from the front and rear. If the boat rotates to much the mast can crash into the lock wall damaging the mast or mast head. If there are no winds, the lines against the bollard slot tend to hold the boat perfectly straight.

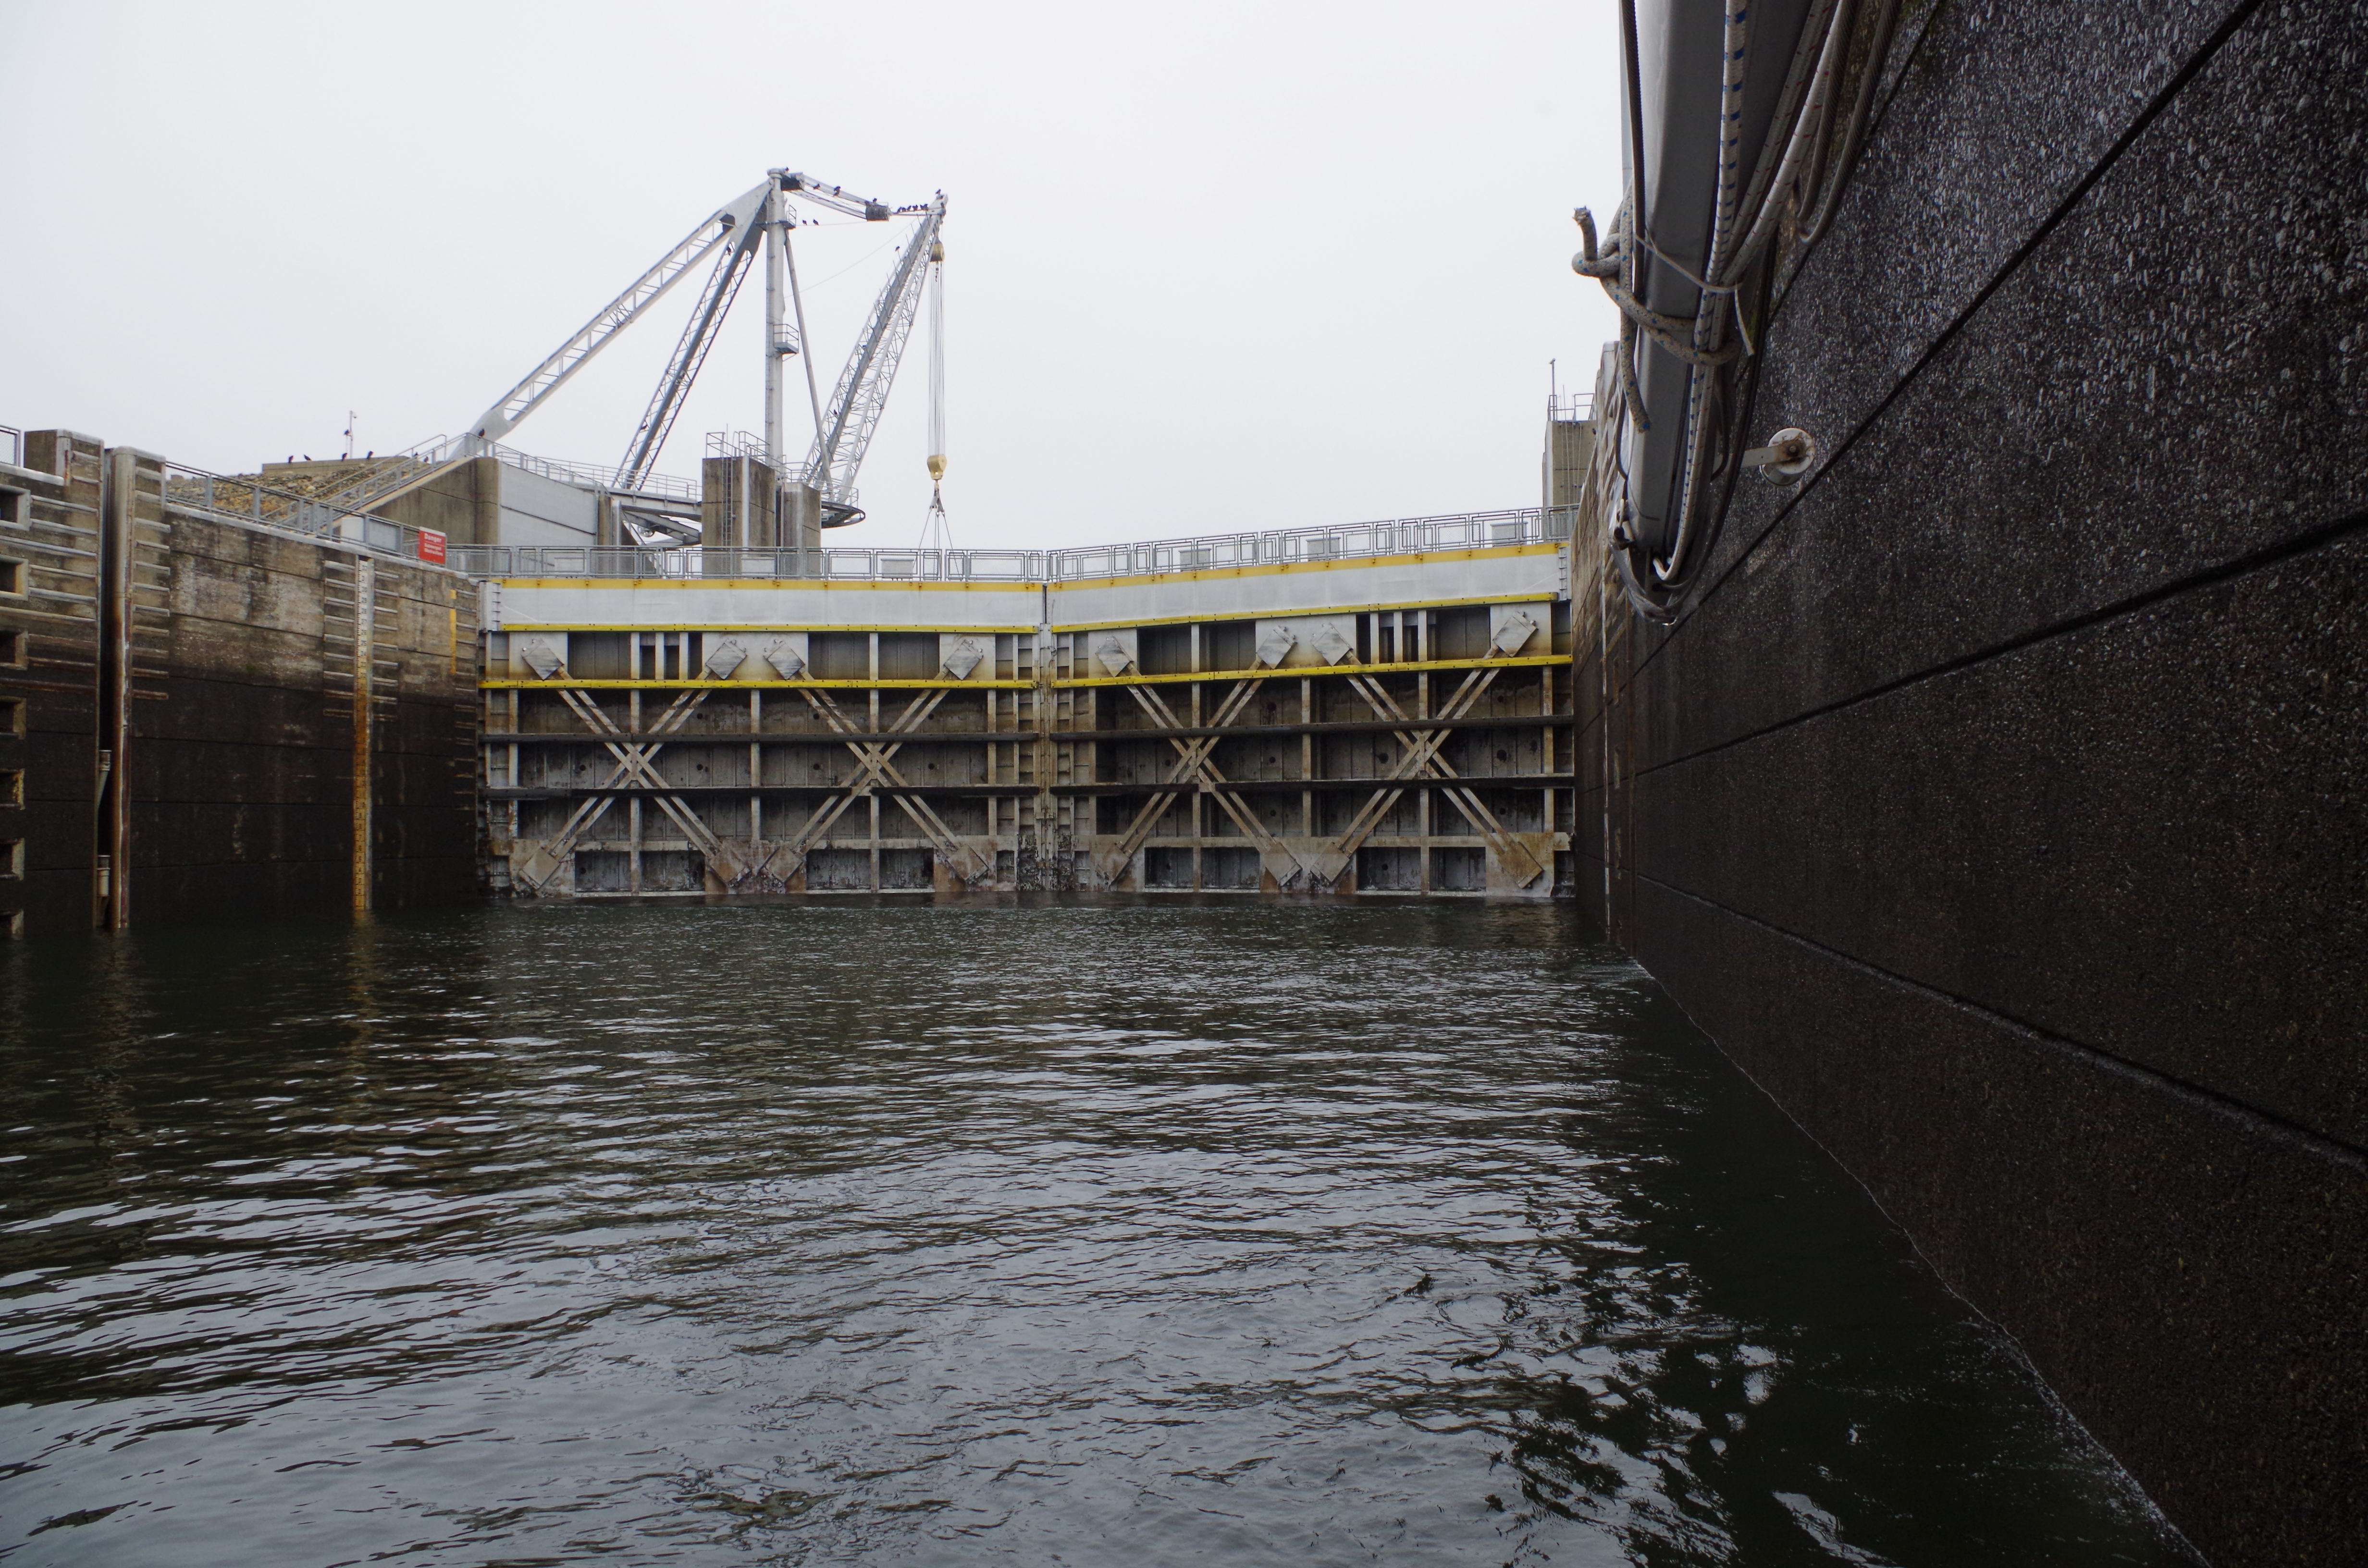
After tying up, we notify the lock master over VHF that we are secure and ready for locking. The lock doors where we entered then start closing. This is the Aberdeen lock.

Here the lock doors are nearly closed.
The lock master is viewing the process from this building on the lock wall.. Here you can see the Aberdeen lock.
After the lock doors are closed, the water starts going down (or up if you are going up). These pictures are from the Whitten Lock (84 foot drop). Looking towards the lock entrance.

And it goes down..
And it goes down…

And when you think it is finished.. it keeps going down..

Finally, we are at bottom pool level!! Look at how far we fell..

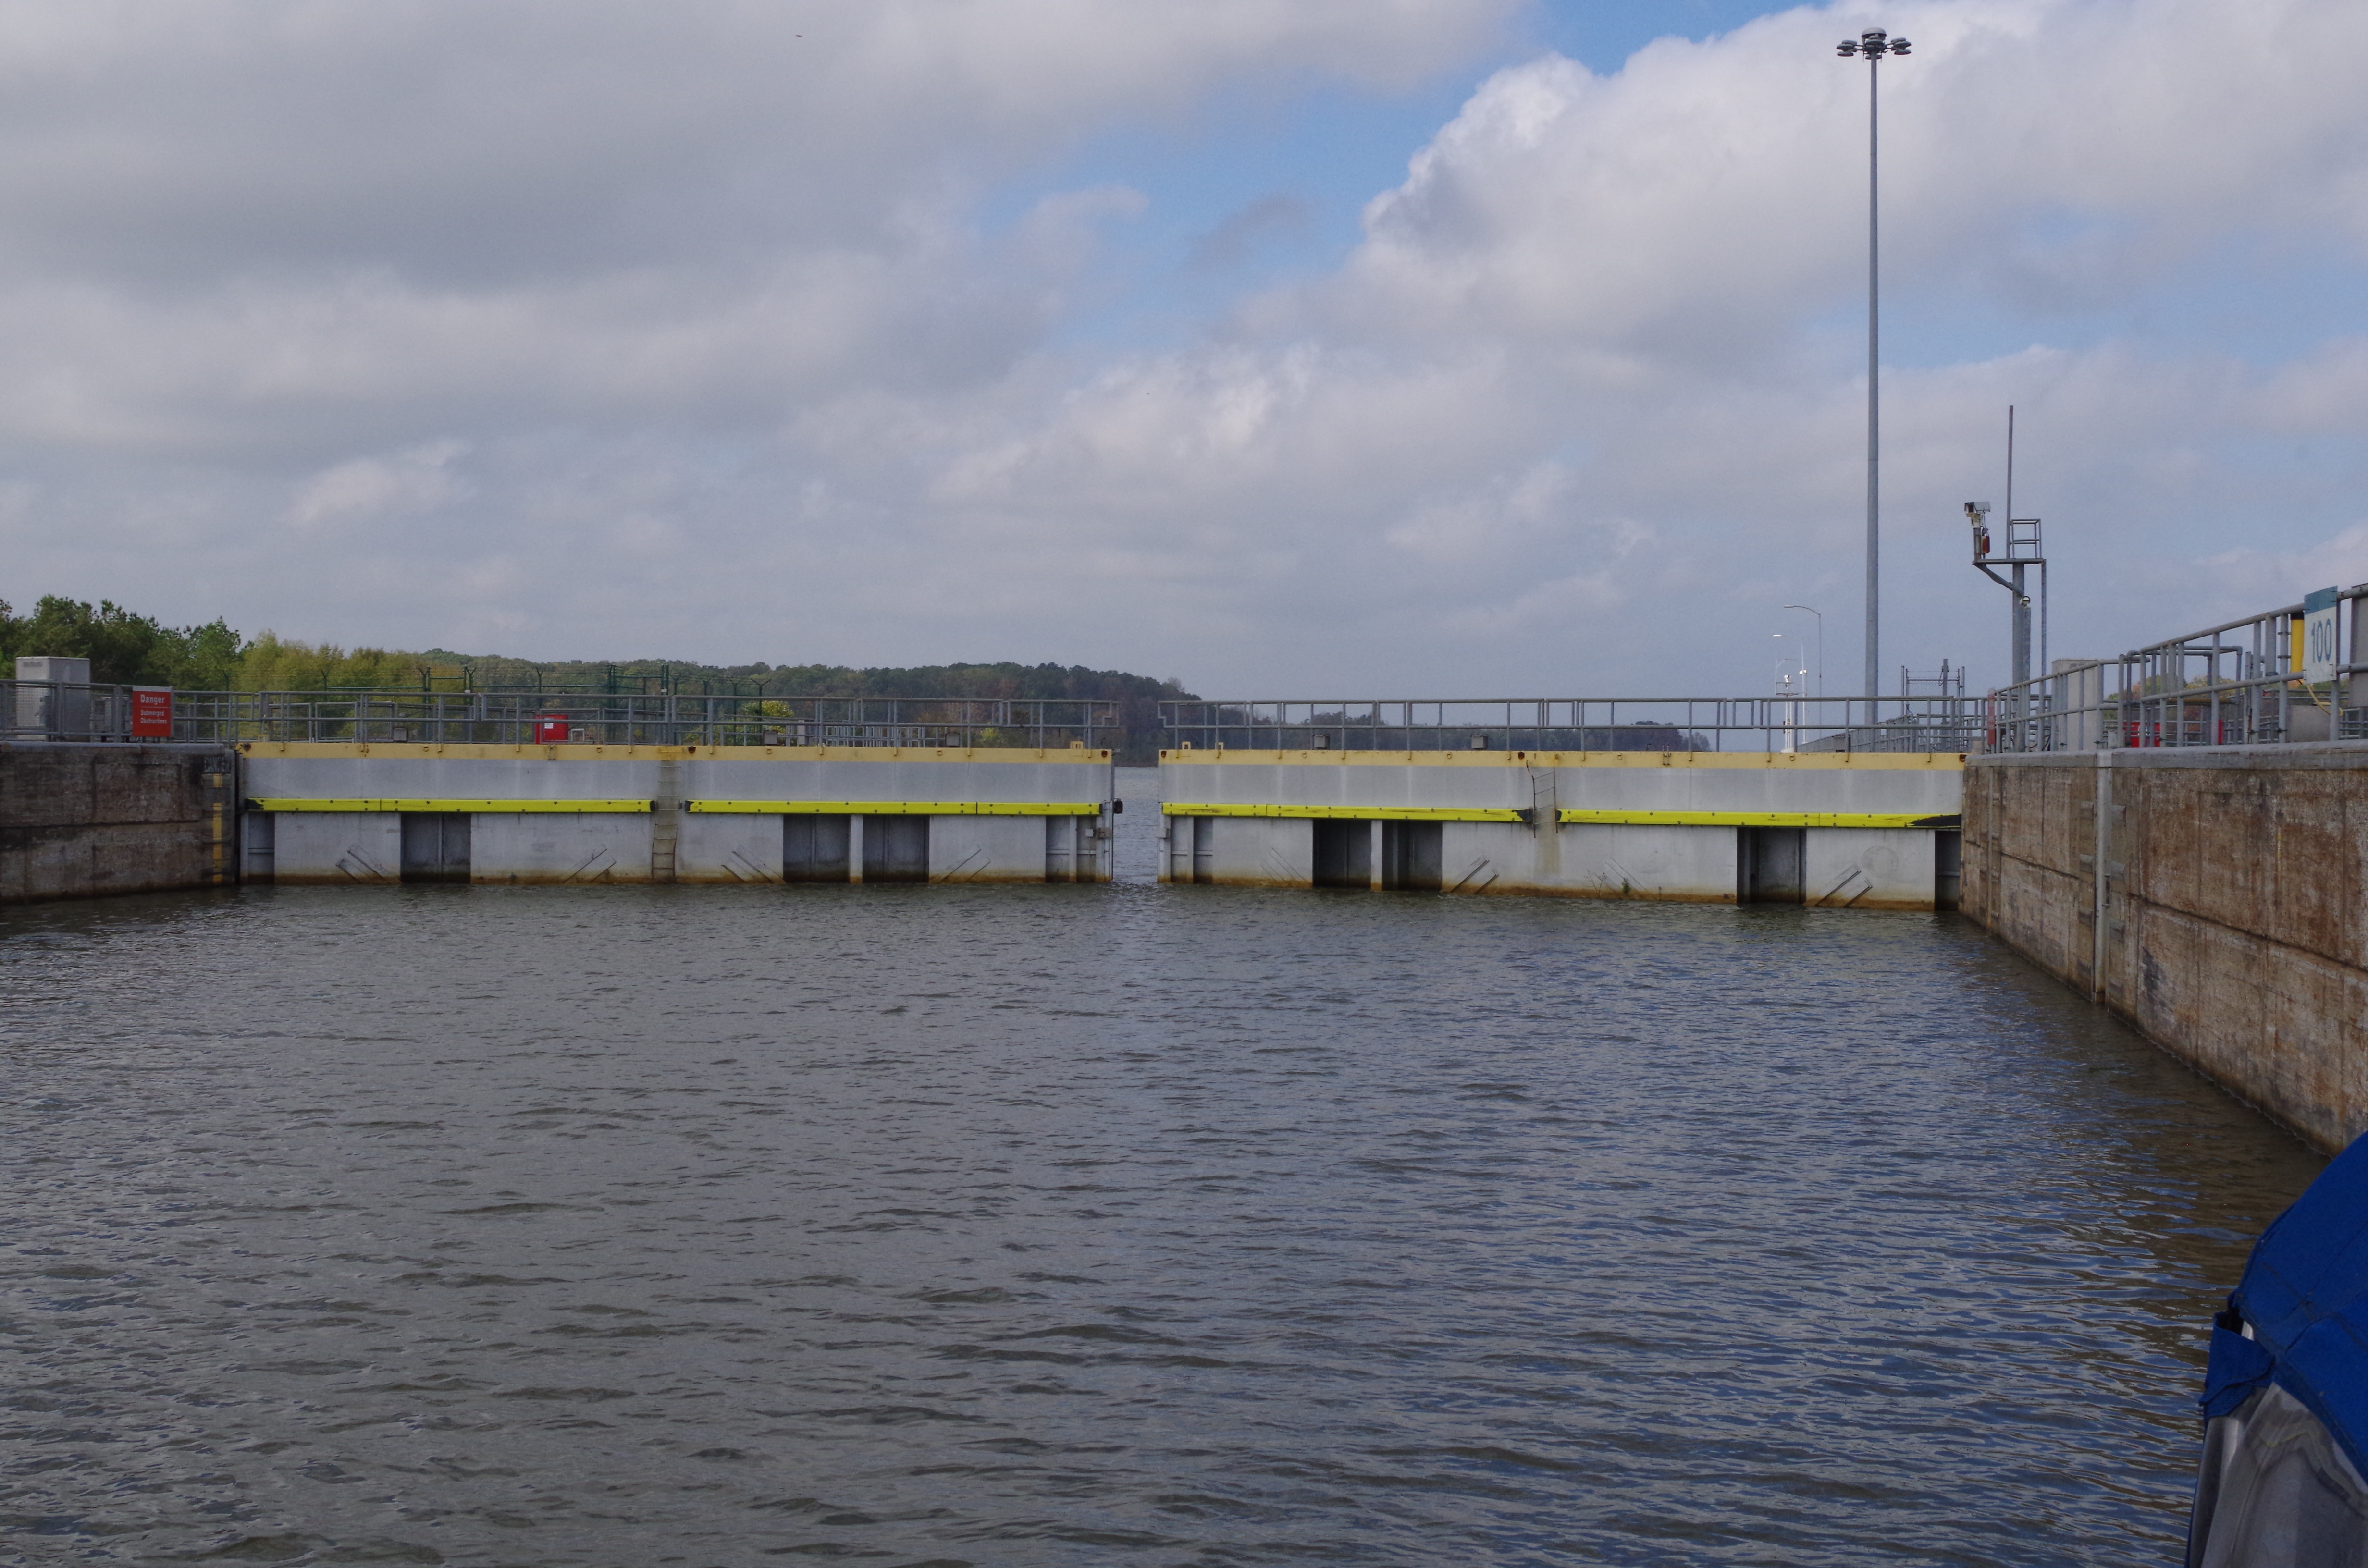
Now we shift our view to the other end of the lock.. The gates start opening at the outlet..

The doors are almost open all the way..

After the gates open all the way, a horn blows indicating we can untie and leave the locks. Here is a picture looking back in the Whitten Lock.

And here is what the exit of the Whitten looks like from shore.

For our inquisitive niece Nicole, I hope this better explains how a lock works.

It looks nice glad you made it through ok looks like everything is going well.⛵️🌴
LikeLiked by 1 person
Yes, it is. We put this blog together with Nicole in mind. She didn’t understand the locking.
LikeLike
Well that was very nice of you you explained it very well and show some beautiful pictures😊🌷
LikeLiked by 1 person
Thank you😉
LikeLike
Very interesting
LikeLiked by 1 person
Thanks Jag.
LikeLike